


Thursday, January 01, 2015
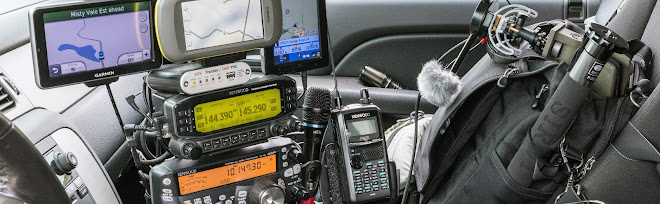
Amateur Radio Mobile Electrical Systems

Battery A mounted on the left side of the engine bay in the stock battery position is an AGM crank battery rated at 800 CCA with 120 minutes of reserve power that I replaced the OEM battery with.
This type of battery is the optimum choice when you are replacing the OEM battery as I did here.
 Since replacing the OEM battery with this AGM battery, it has proven to be a good choice for a crank battery, and with the reserves required to power the radio stack.
The B battery as seen to the right of the photo is another AGM battery (55 amps) also rated at 800 CCA and 120 minutes of reserve power.
This battery is mounted in the optional battery position, that fortunately had the OEM battery mounting plate in place from factory.
All I needed to do was purchase the correct sized battery, and the OEM wedge and bolt required to fasten the battery in place.
This was a necessary work around as the Avalanche does not have a OEM battery option, but does have a battery management system with the computer monitoring the charging system.
The vehicle computer will turn on the check engine light as the B battery comes on line for charging if the second battery is connected as per normal in a two battery system.
Connecting the B battery to the B+ wire that is part of the trailer towing electrical harness eliminated this problem.
This work-around worked out well.
If you look close at the photo, you can see that I installed a 200 amp quick-disconnect at the B battery, that is a duplicate to the one mounted on the power-pack in the cargo bay that houses the C battery.

If my main battery (A) is accidently discharged to the point that it will not crank the engine, its as simple as connecting my jumper-cables to battery B, and then connecting them to battery A.
When required the B battery is easily removed from my mobile with the optional handle, allowing the battery to be used with the C battery power-pack as a part of a two battery storage bank, for use in a remote back-country camp, or for emergency preparedness situations.
Running a 12 volt shop for a lot of years, I have seen the parasitic draw in vehicles go from an average of 20 mA through 40 mA and continuing to increase over the years.
Then you take that vehicle and add a few aftermarket devices and guess what....the parasitic draw is killing the battery in less than a week or two, if you are not starting it up and driving it on a daily bases.
Today its not unusual to see the parasitic draw on the battery of vehicles with the multitude of electronic components located throughout, and with the addition of a few aftermarket devices in the range of 80 to 90 mA,
So we come full circle to our mobiles that we install a multitude of ham gear in, and these devices are drawing power when they are shut off, yes they are.
 With the two AGM batteries powering the vehicle (one is the crank battery) and my radio stack, and I still felt there was a need to disconnect the power from the batteries to my radio stack for the times that I may be away from my vehicle for a week or more.
Commonplace in heavy duty equipment are manually operated disconnect switches in the main feed line from the battery.
I had been meaning to install one of these disconnect switch's in the main power feed line to my radio stack for some time.
After purchasing a disconnect switch rated for 225 amps continuous duty, I looked for a convenient place to mount it.
I found the perfect place to mount it as seen in the lower left of the photo, making it convenient to operate from the drivers seat upon exiting or entering my mobile.
My radio stack and the other devices powered from this feed, may now be powered down completely when I feel its required.
Having a high performance electrical system as part of your mobile, it is important to check on the health of the system on a regular bases.
I recently acquired a watt meter/power analyzer, and its proving to be a handy device to have for all the right reasons.
In this photo I have this inline watt meter/power analyzer in line between the batteries (SOURCE) mounted in the engine bay of my mobile, and the 12 volt DC to 110 volt AC inverter (LOAD) mounted beneath my radio stack, with a 110 volt AA battery charger plugged in to it.
 Just so you know, I had just started the engine in my mobile when I shot this photo, and In this case the battery charging voltage is 14.62 volts with the engine at a fast idle. The radio stack amongst other accessories had been in play for several hours or more before my having started the engine.
 This meter in line with the charging system makes it easy to monitor the charging system, and within a few minutes as the batteries come up to charge, the charging rate drops off as expected.
The charging rate will then vary depending on the load on the batteries.
The watt meter is designed for systems using less than 60 volts and carrying currents up to 130 amps, and measures eight parameters that are essential to electric power safety and performance of any mobile. It may be used it to prevent peak currents from damaging the batteries. check on the gearmotors in my HF antennas, as well as the wiring and connectors throughout my mobile.
It also may be used to set cutoff voltages, check battery capacity & health, and confirm that the batteries are being charged properly by the charging system.
Each time power is applied across the watt meter, a startup screen with logo is briefly displayed and peaks, minimums, Ah & Wh are reset to zero. Then the display changes to the measurements screen.
The measurement screen continuously displays Amps, Volts and Watts. All other measured values are presented sequentially, every second, in the Data-Queue position of the display. Data values are identified by their units (Ah, Wh, Ap, Vm, Wp). All measurement screen values are updated every 0.4 seconds.

On a final note, I use powerpoles exclusively on all my ham radio devices, including on my gearmotor antennas, and as noted I have powerpoles installed on this meter making it convenient to place it in line with my various devices for monitoring purposes.
So remember, to keep your mobile performing as efficiently as possible, monitoring the batteries and their related components is of the upmost importance, and by performing regular maintenance, your mobile will continue to be a top performer.
All photos expand....
For more info on my ham radio ops and my other interests....
www.jerryclement.ca
No comments yet